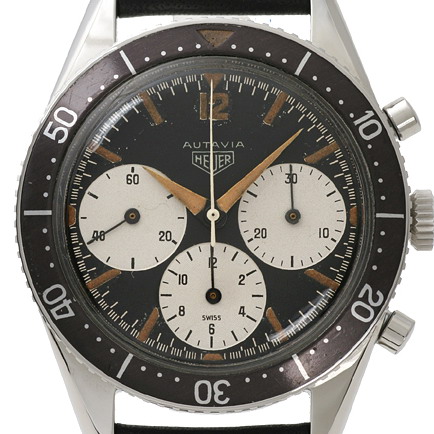
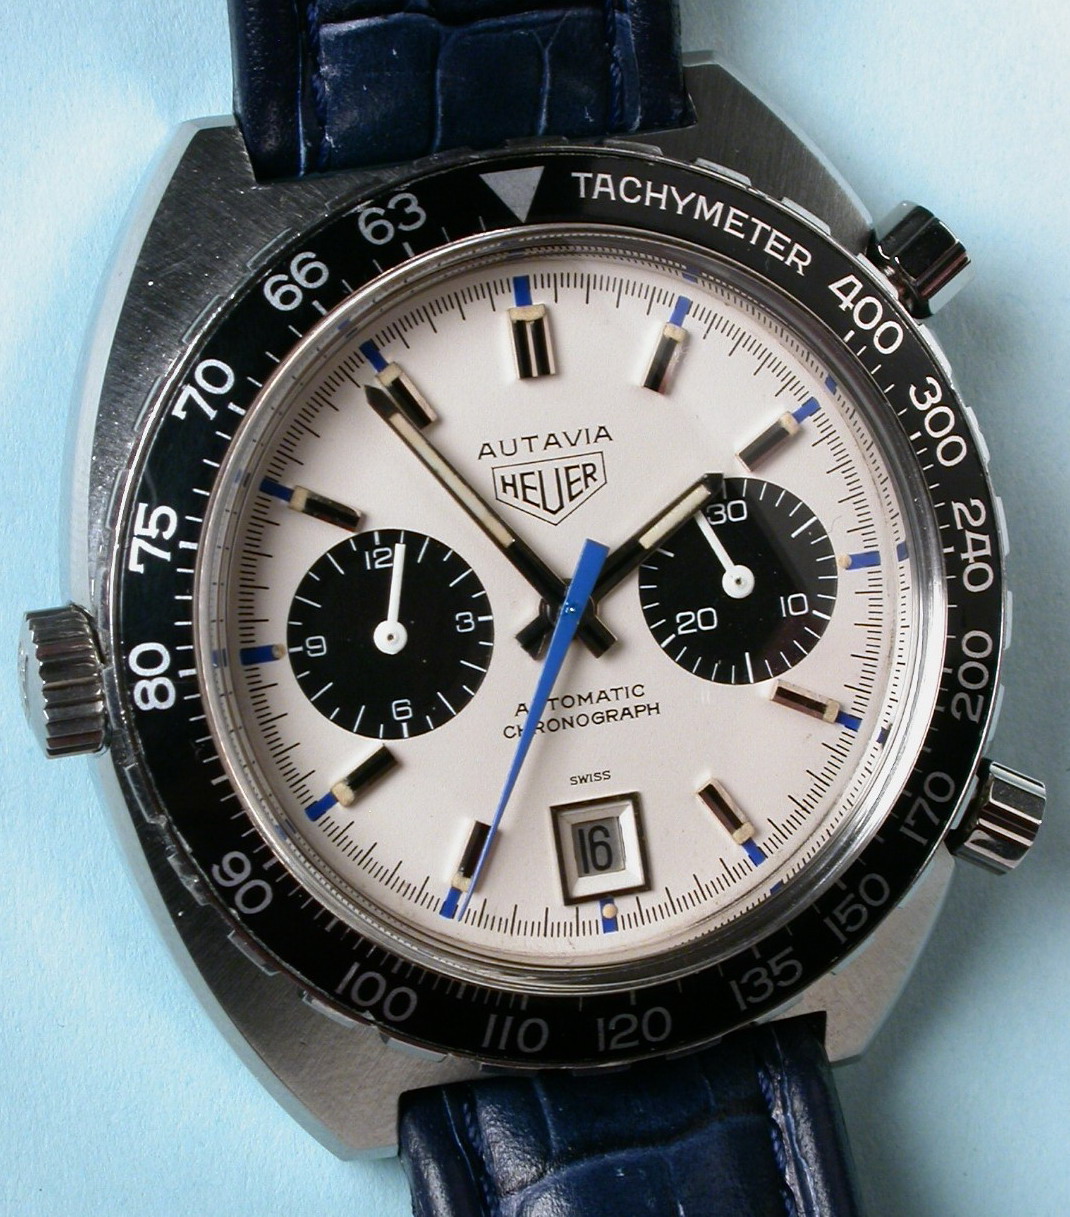
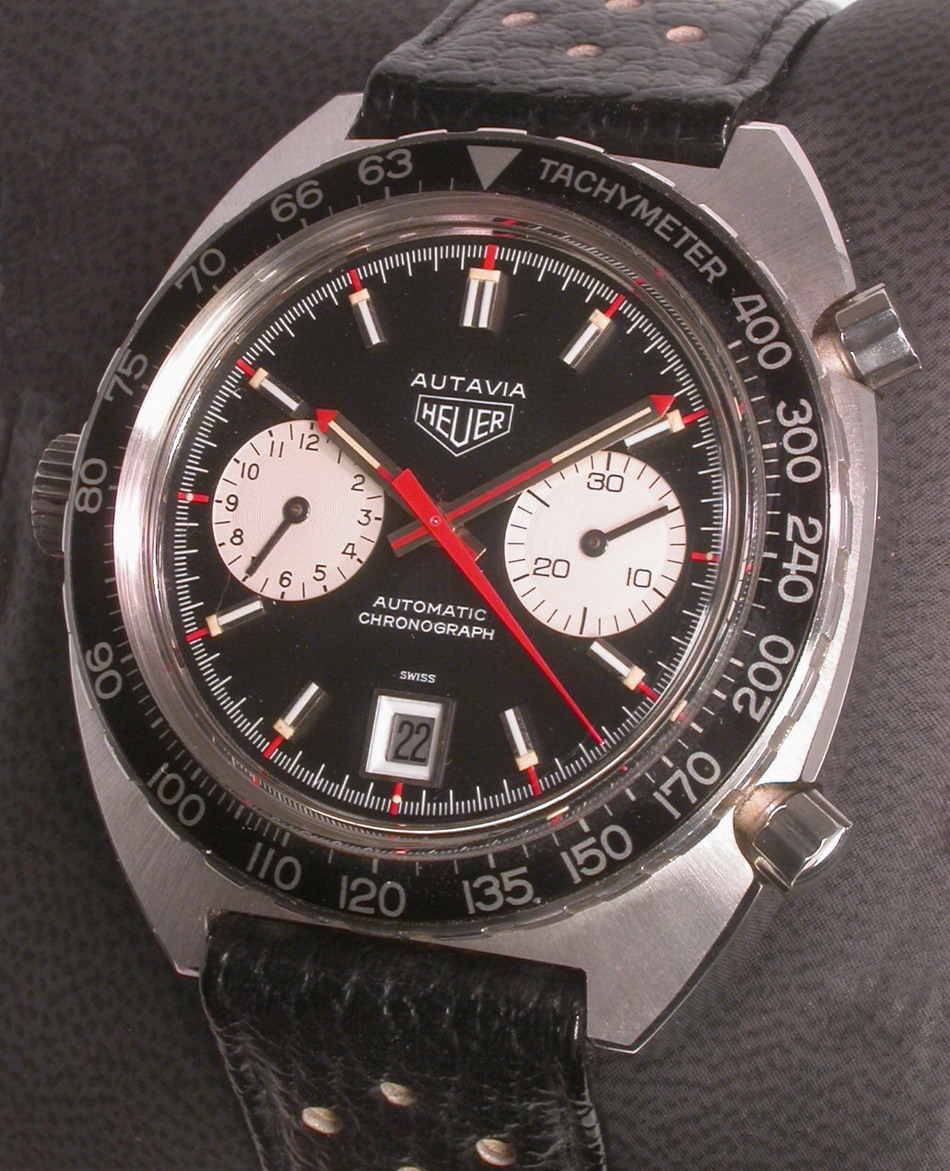
Two popular versions of the Heuer Autavia from the 1970s, the Reference 1163T (known as the “Siffert” model) and the Reference 1163V (known as the “Viceroy” model), are distinctive among vintage chronographs in having rotating tachymeter bezels. So it came as no surprise when one of our readers asked about the “functional benefit” of having a rotating tachymeter bezel on a chronograph. He asked, “ . . . would one ever rotate the Tachy bezel?” A simple question . . . exactly seven words.
“So What is This Tachymeter For?”
Searching Google, I found a barrage of questions about tachymeter bezels, all in a single posting on a discussion forum. The writer asked, “What use is the ‘Tachymeter’? . . . I feel quite annoyed, time from time, when seeing that dreadful ‘tachymeter’ bezel on watches (one of mine has that thing too). I just can’t understand what possible function it may have. Looks? Well, maybe for some people. Time-telling? Not really, the numbers there have no correlation to minutes, hours, days or even weeks. Calculating? Again no, those are often stamped on non-rotating bezels. Chrono? Again, not really, as the numbers don’t really make any sense. So what is this ‘tachymeter’ for? And, if it has a use, are you actually using it or is it just a ‘design thing’ that you don’t mind?”
The question, “What use is a tachymeter?” appears to be simple enough, but the answer is complex. It becomes far more difficult when we consider the use of a rotating tachymeter bezel. I will try to keep my answers relatively simple; if readers would like to “drill down” to discuss some of the nuances, we can do so in additional postings.
The Purpose (and Mathematical Basis) of the Tachymeter Bezel
I will assume that our readers understand the basic purpose of a tachymeter scale (as incorporated into a chronograph) – to determine the speed of an object traveling a fixed distance. If the chronograph itself measures the time that it takes to cover a known distance (for example, the seconds that it takes to cover one mile or one kilometer), the tachymeter bezel provides a direct reading of the average speed that was achieved over that distance (most commonly, miles per hour (MPH) or kilometers per hour). The basic math incorporated into the tachymeter scale is simple: Divide 3,600 (the number of seconds in one hour) by the number of seconds that it takes to cover one mile, and you will see your average speed, expressed in MPH. [For a refresher on the basic use of a Tachymeter bezel, have a look here, here or here. You can even find a video entitled, “How Do You Read a Tachymeter?“]
Let’s Start with a Fixed Tachymeter Bezel
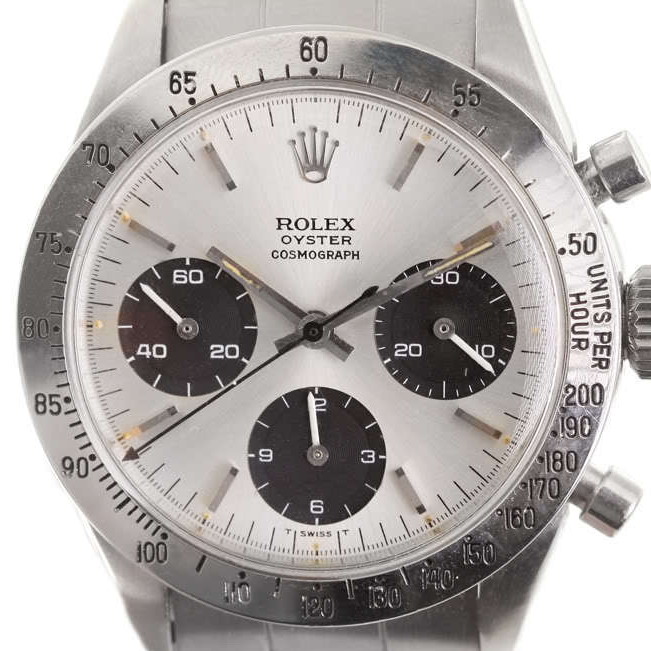
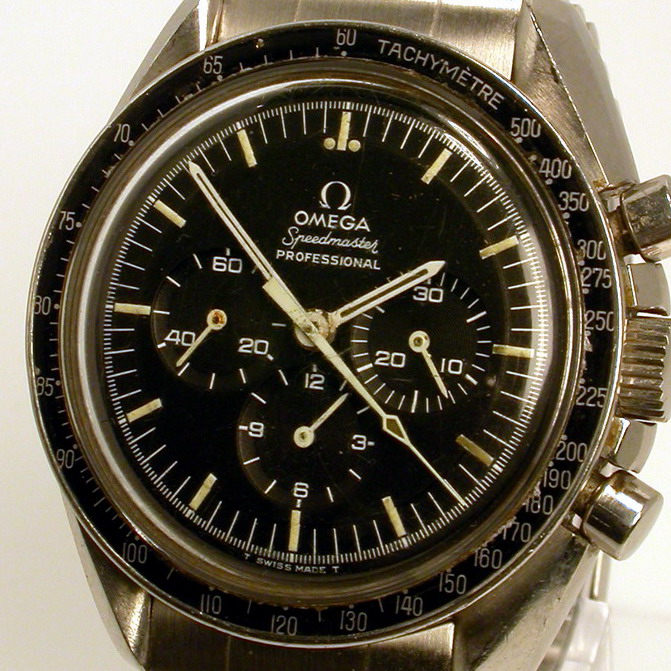
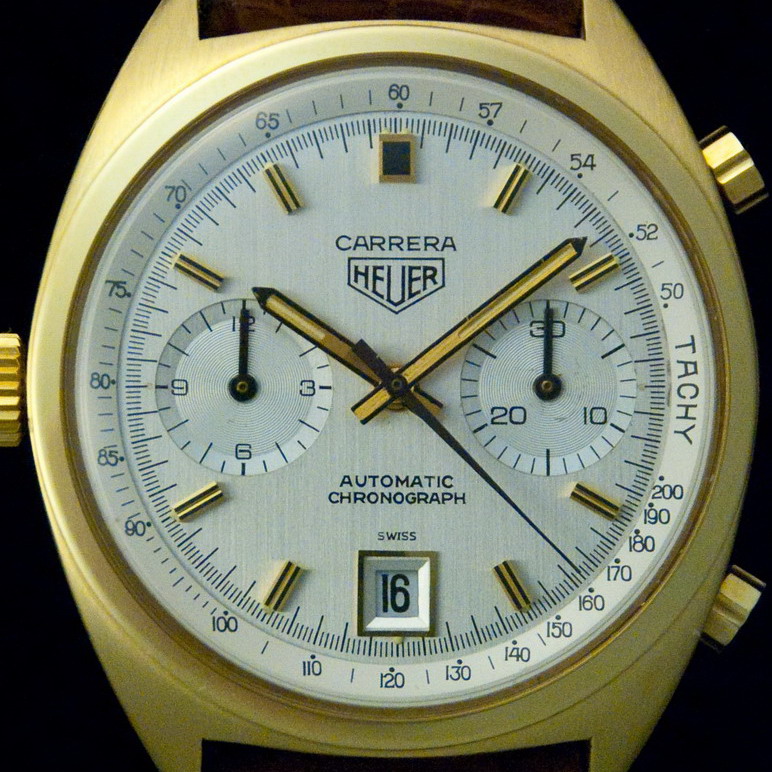
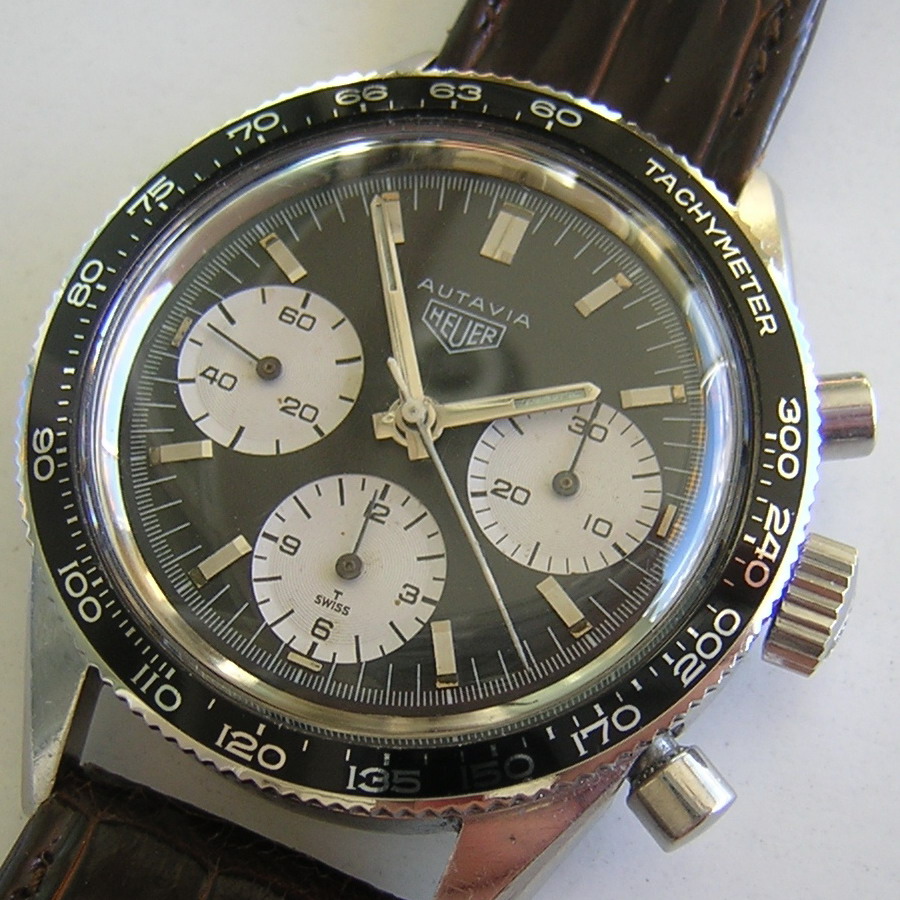
Let’s begin our discussion of tachymeter bezels by having a look at a chronograph that has a fixed tachymeter bezel, meaning that the bezel does not rotate. Some examples of chronographs with fixed tachymeter bezels are the Rolex Daytona and the Omega Speedmaster (both having fixed outer bezels) and a Heuer Carrera 1158 or Heuer Montreal (both with fixed inner bezels).
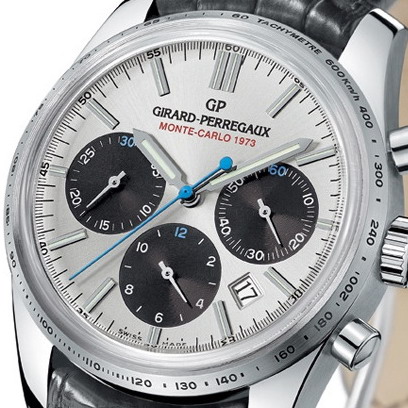
Looking at the Carrera (third watch shown above), imagine that the driver started the chronograph at the beginning of a measured mile, and stopped the chronograph as he passed the one mile marker, 22-3/5 seconds later. By a direct reading on the tachymeter bezel (i.e., seeing where the chronograph second hand falls on the tachymeter bezel), we determine that the driver covered that mile at a rate of approximately 160 miles per hour. (i.e., 22-3/5 seconds for one mile means that he would have covered 160 miles in one hour). So far, so good . . . we have covered one mile, and used the tachymeter bezel to compute our speed over this mile.
Notice that that a tachymeter scale printed on the dial of a chronograph is the functional equivalent of a tachymeter scale printed on a bezel. It’s just that the scale is fixed on the dial, rather than being fixed on the bezel.
Whether on the bezel or on the dial, starting with the chronograph second hand in the 0 position, we can use the chronograph to time one measured mile (or kilometer), and the tachymeter track will show us the MPH (or KPH) for that mile.
The Challenge — Computing Average Speed per Mile (MPH) Over Consecutive (Sequential) Miles.
To study the Carrera shown above will also illustrate the limitations of the fixed tachymeter bezel. This Carrera is a good tool for computing your average speed over one measured mile, but what if you want to keep driving, and determine the speed over a second (or third or fourth) measured mile? Of course, we have the same “problem” with the Rolex Daytona and the Omega Speedmaster (and all the other chronographs that use a fixed tachymeter bezel).
Let’s say, for example, that you are driving from Atlanta, Georgia to Birmingham, Alabama, along Interstate 20 . . . a highway on which every single mile is marked by a small green sign, showing the mile number. If you start the chronograph with the chronograph second hand at 0, and stop the chronograph 22-3/5 seconds later (when you pass the first mile marker), you will know your speed for that first mile, but – having stopped the chronograph — you have no way of timing the second mile.
So what timekeeping / computing tools are available if we want to determine our time and pace over several consecutive miles?
The Most Elegant (and Accurate) Solution.
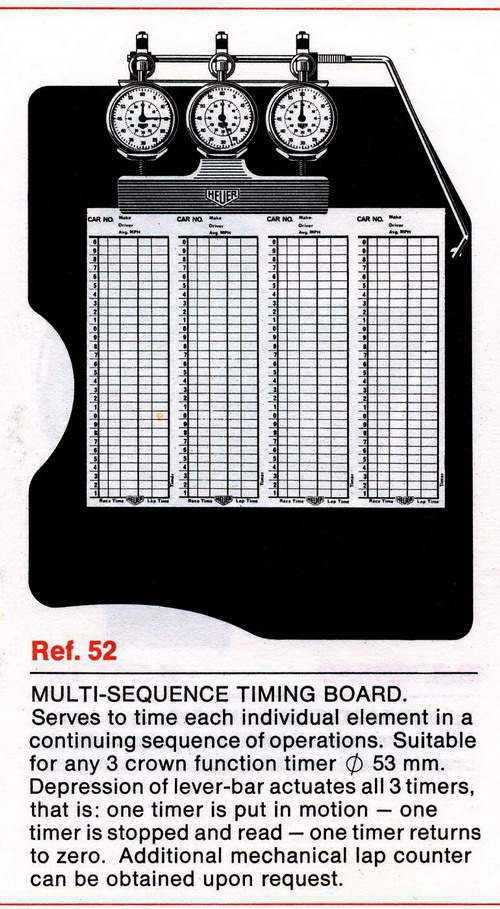
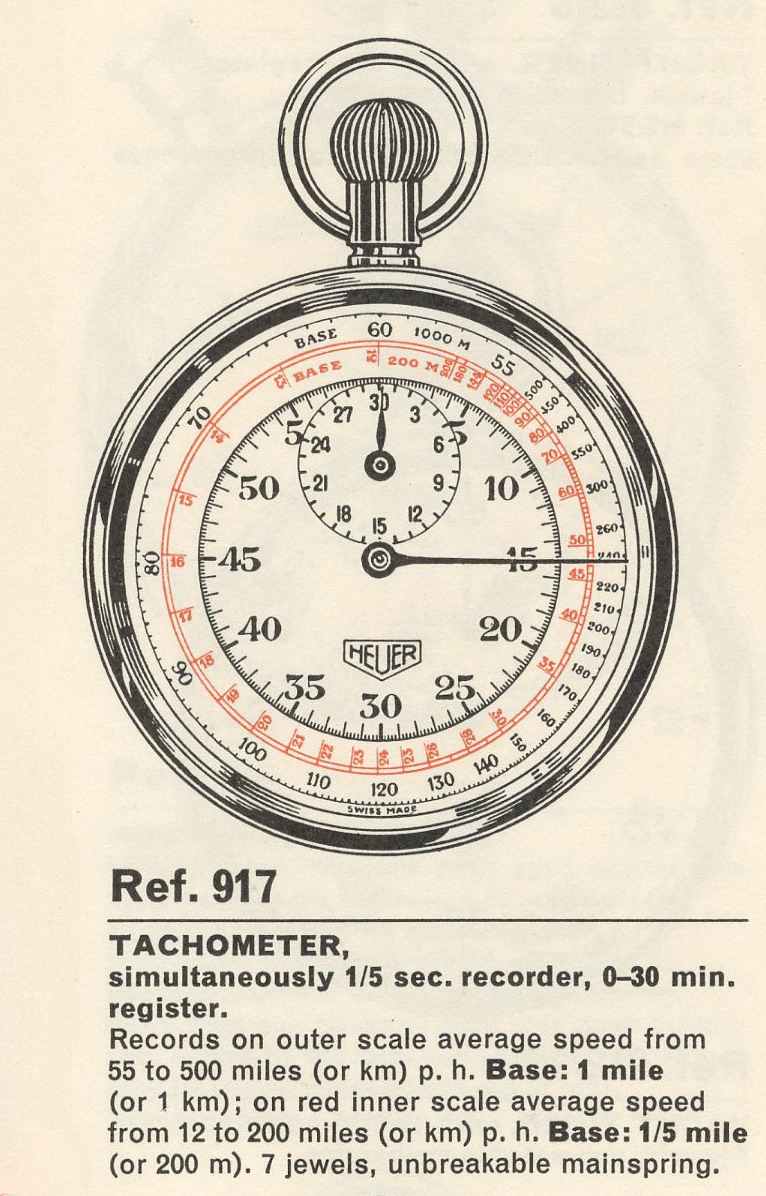
The most elegant solution to timing (and computing speeds over) a series of measured miles will be to use three stopwatches on a multi-sequence timing board (sometimes called a “lap timer”), as shown below. Each stopwatch has a three-function crown, that starts, stops and resets the timer with consecutive pushes. Using the three stopwatches mounted on this timing board, as one timer is stopped, the second timer is started, and the third timer is reset to zero. So as you go from one mile to the next to the next, you will always have one stopwatch stopped on your elapsed time for the previous mile, one stopwatch showing your running time for the current mile, and one stopwatch resting at zero, ready to start timing the next mile. Each push of the lever across the top of the crowns operates the start / stop / reset for all three stopwatches. If these stopwatches have a tachymeter scale on the dial (as on Heuer’s Reference 917 stopwatch, shown below), you are all set . . . you can drive the 150 miles from Atlanta to Birmingham, and the three watches will give you the exact time (and MPH) for each of the 150 miles.
To describe this “elegant” solution serves to highlight the problem for the average driver: What if, rather than having three stopwatches on a large multi-sequence timing board, and a navigator to operate the contraption, you are driving and have only a single chronograph at your disposal? As we saw above, the Carrera (or Daytona or Speedmaster) is great for timing the first mile, but there is no good solution from that point forward (or westward, in our Atlanta to Birmingham example). Perhaps you can keep the chronograph running the whole way, and write down the exact times that you pass each of the markers, but that won’t give you an instant reading of your MPH, as you cover each mile.
Another Approach — The Flyback Chronograph with Tachymeter Scale
Assuming that the lack of either space or a navigator make the use of the multi-sequence timing board impractical, there is another approach that we can use to determine the speed per mile, over sequential measured miles — a flyback chronograph with a tachymeter scale. The timing operation is fairly straightforward — each time we pass a mile marker, we take a direct reading on the tachy scale (to see average speed over the mile that we have just completed) and push the flyback button (to instantly begin the timing for the next mile).
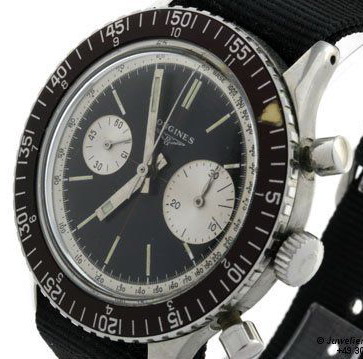
Flyback chronographs were relatively uncommon in the “golden age” of chronographs, however, being used primarily in chronographs designed for pilots. Breguet produced the Type XX for the French Air Force, commencing in 1954, and Leonidas and Heuer produced their flyback chronographs for the Bundeswehr, in the 1960s. The flyback feature was rare, however, in chronographs for civilians, as leading brands such as Breitling, Gallet, Heuer, Omega and Rolex did not offer this feature.
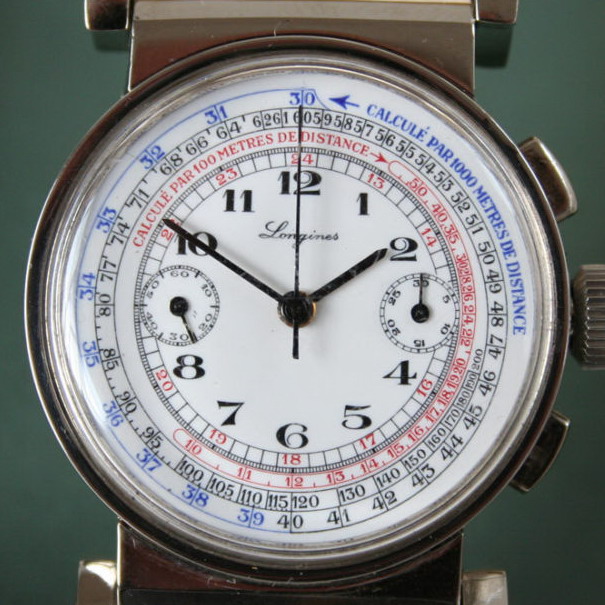
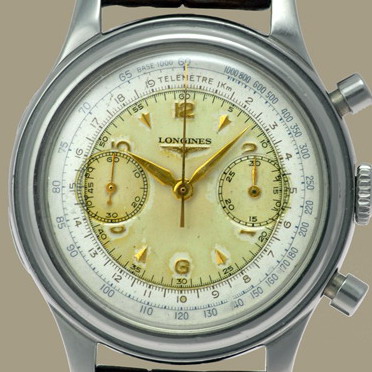
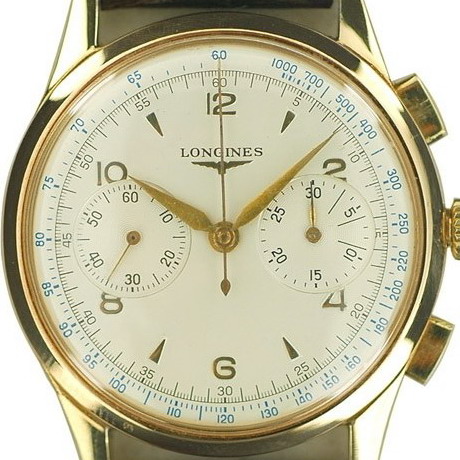
Over this period, Longines was the only major brand to offer flyback chronographs intended for non-military customers, with these timepieces being powered by the legendary 13ZN and 30CH in-house movements. Here are some samples of Longines flyback chronographs that span the decades from the 1920s through the 1970s.
There are a couple of difficulties, however, with the use of a flyback chronograph for the purpose purpose of timing sequential measured miles (or laps). First, the use of a flyback chronograph for this purpose will be somewhat imprecise. The chronograph second hand will be “flying back” to zero, and restarting, at the very instant that you are taking the MPH reading on the bezel. So you will be reading a thin hand that will be moving, stopping and resetting, all at the very same instant. Second, technical aspects of the flyback movement raise issues about the accuracy and reliability of its timing. It is a technical challenge for the chronograph second hand to stop, flyback to zero, and restart, all in the same instant, and there is some lack of accuracy in the process. Third, flyback chronographs record the time for one event (being a mile or a lap), and then reset to zero and restart. So you will not be able to record a total time, for all the miles that you are timing (your trip from Atlanta to Birmingham, for example). Finally, the construction of the flyback chronograph is complex, and these watches tend to be rare (meaning that they are also expensive).
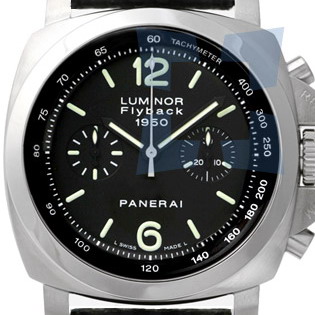
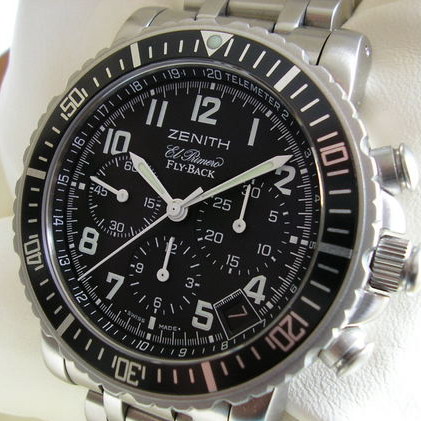
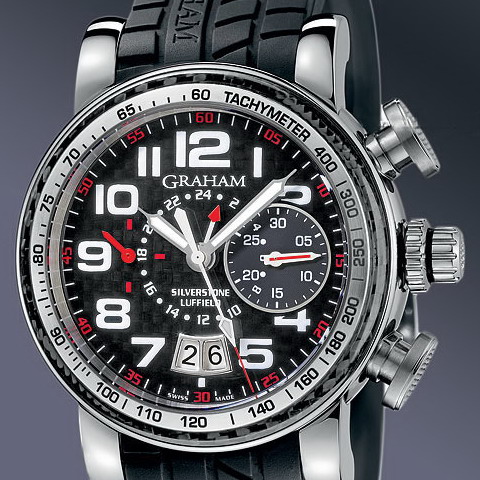
Mechanical chronographs with the flyback complication have recently become much more common, at least compared with previous eras. Shown below are recent models of flyback chronographs from Panerai, Girard-Perregaux, Graham and Zenith. All these models have fixed tachymeter bezels, making them useful for computing speed over a measured mile, with the flyback allowing the determination of average speeds over sequential measured miles.
But Wait, Why Not a “Taylor” Split Second Stopwatch?
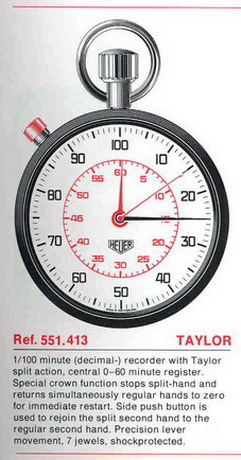
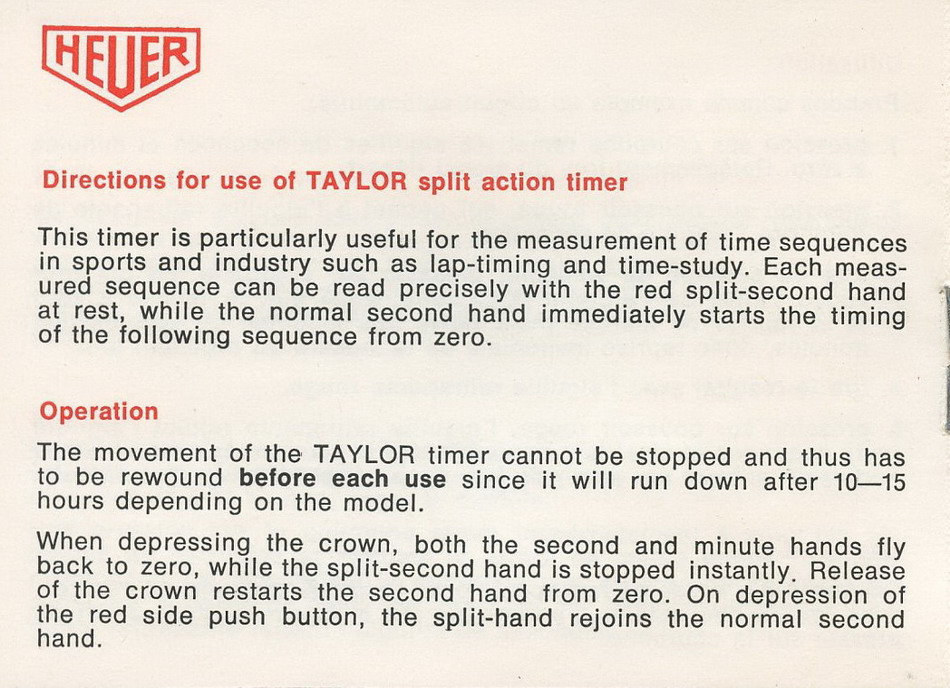
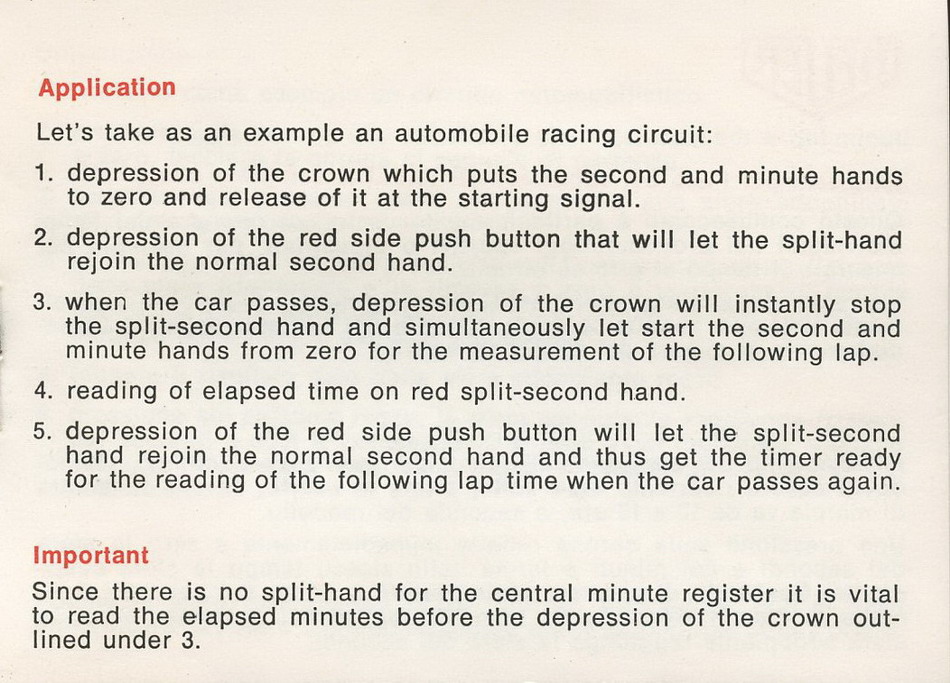
Next up on our list of possible solutions for timing consecutive measured miles would be a split second stopwatch that uses the “Taylor” system of lap timing. A stopwatch using the Taylor system begins like any other stopwatch, but when you push the crown at the end of the first mile (or the first lap), some unusual things happen. First, when you push and release the crown at the end of a lap, the main hands (minutes and seconds) fly-back to zero, and instantly begin timing the second lap.
And if that’s not enough technology to impress you, the Taylor’s use of a split second hand is certain to please. When you depress the crown at the end of the first lap, while the main hands of the stopwatch fly-back and instantly begin timing the second lap, a red split second hand stops and stays in its position (where it was at the end of mile one), so that you can read the precise time, with the split second hand stopped. Once you have taken this reading, you push the little red button to the left of the crown, and the little red split second hand rejoins the main second hand, which is busy timing the second mile. You get accurate readings of the time for each mile, mile after mile after mile.
The Taylor system is perfect for lap timing. However, it falls short in the mission to compute the average speed for each mile, on my drive from Atlanta to Birmingham, for the simple reason that it does not have a tachymeter scale. The last thing I want to do when I get to Birmingham is to sit with 150 lap times, and convert each of them into MPH. I want a direct reading of the average speed of each mile; the Taylor is a wonderful system, but it’s not the tool for this assignment.
Heuer’s Solution – The Rotating Tachymeter Bezel.
If you have quick hands and a good eye, and don’t might a bit of distraction while you drive (or navigate), the Heuer Autavia chronograph with a rotating tachymeter bezel can be used to provide direct reading of your speed over sequential measured miles. It’s not as accurate as the multi-sequence timing board, and it’s not as simple as the flyback chronograph, but Heuer’s unique timing system has the advantage of being available on any vintage Autavia that is fitted with a tachymeter bezel. Left running, the Autavia will also record your cumulative time over the race event. Perhaps best of all, in 1972 the Autavia equipped with a rotating tachymeter bezel was available for $88, through a promotion with Viceroy cigarettes. For all these reasons, the Heuer Autavia became a valuable tool in the hands of racers and rallyists of the 1960s and 1970s.
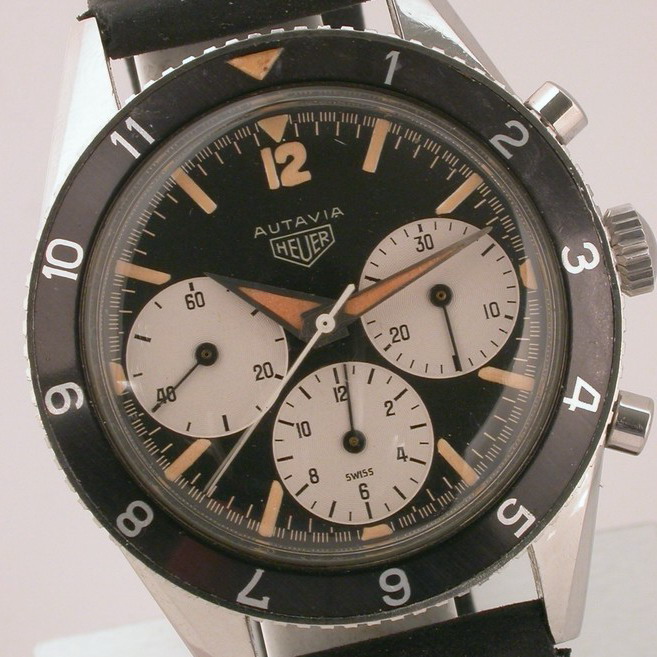
Let’s go step-by-step, and mile-by-mile, to see how the Heuer Autavia was used to measure times and compute speeds, over sequential measured miles. [In these photographs, please do not pay attention to the time-of-day shown by the main hands on the Autavia. Please focus on the chronograph hands and the tachymeter bezel.]
- We start with the chronograph second hand stopped at zero, as we approach the zero mile marker. The moment that you pass the marker, start the chronograph running.
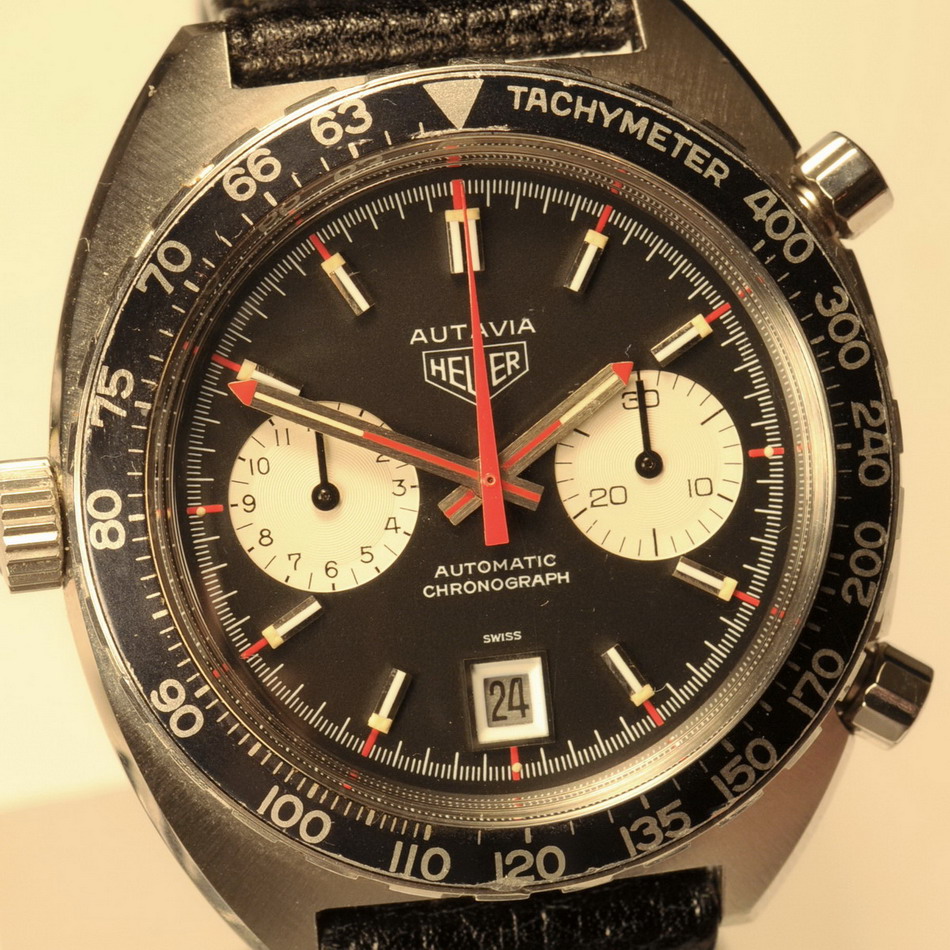
- The moment that you pass the 1 mile marker, you keep the chronograph running, but take a reading of the chronograph second hand on the tachymeter scale. With the chronograph second hand at the 36 second mark, the tachymeter shows that you covered this first mile at an average speed of 100 MPH.
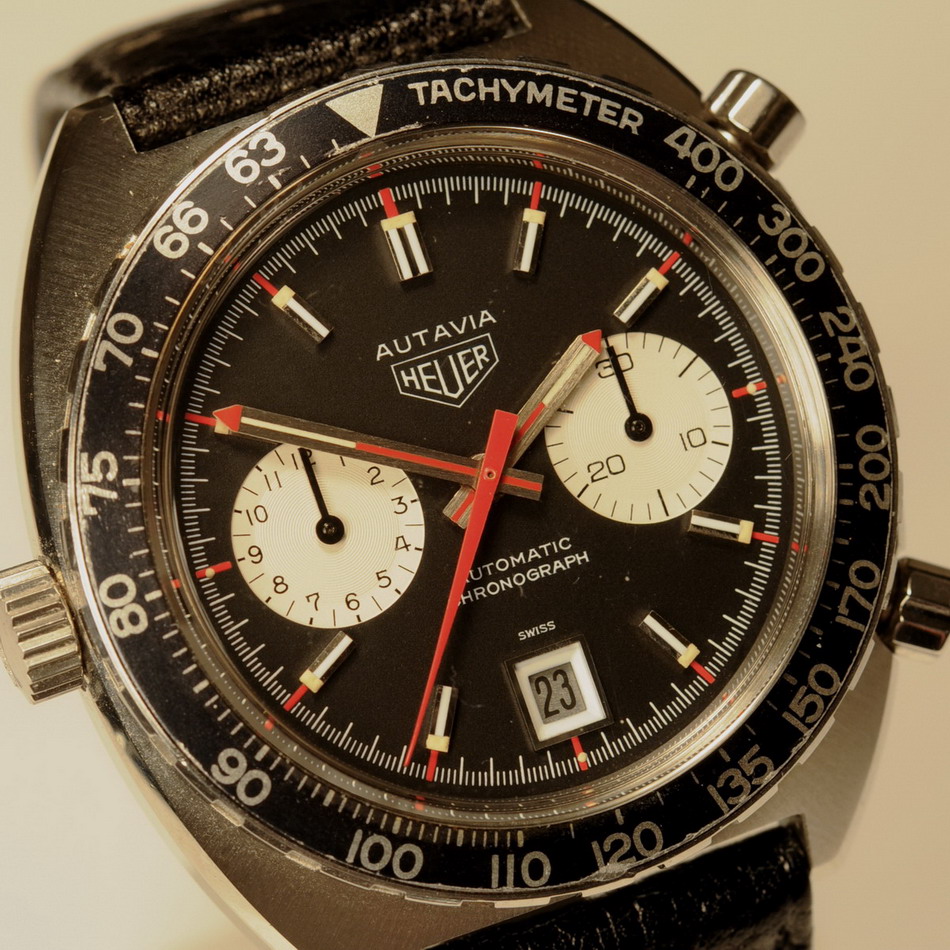
- After you complete the first mile, rotate the bezel so that the triangle (arrow) is at the point at which you finished the first mile / start the second mile (i.e., the 36 second mark). The tachymeter bezel is now positioned to show your speed for the second mile.
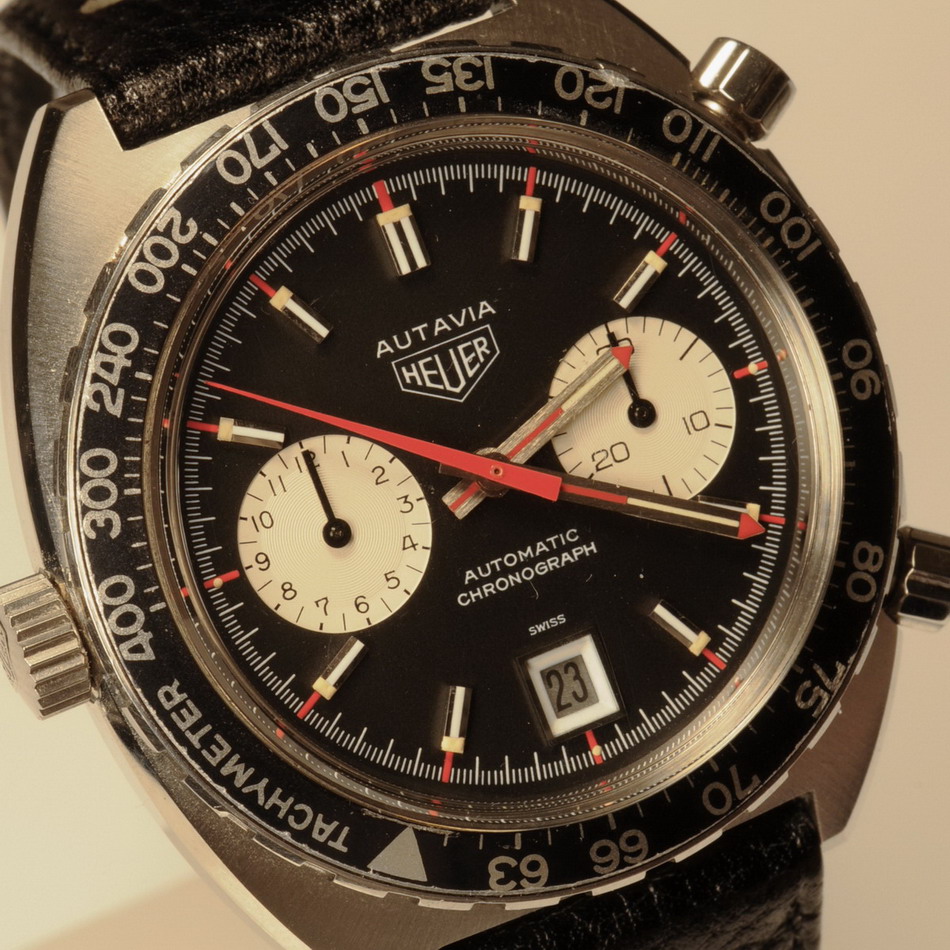
- Let’s say that you pass the 2 mile marker 34 seconds later, when the chronograph second hand is at the 10 position on the dial. With the triangle (arrow) set at the 36 second mark (which is where you put at after you passed the 1 mile marker), the tachymeter scale shows you that your average speed for the second mile was exactly 106 MPH. Brilliant!!

- As soon as you pass the 2 mile marker, you will need to rotate the triangle (arrow) to the 10 second position, so that the tachymeter scale will be in the proper position to make the speed computation for the third mile.
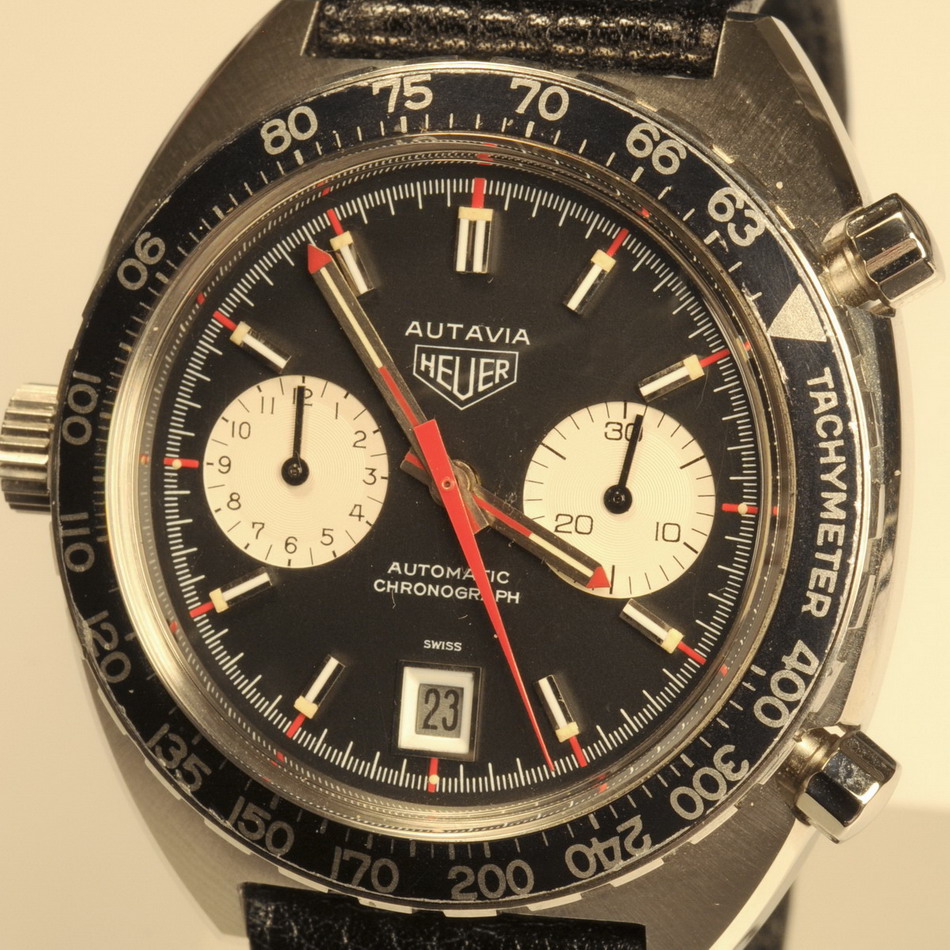
- As you pass the 3 mile marker, 32 seconds later, the chronograph second hand is at the 42 second position and the tachymeter scale shows you that your speed for the third mile was approximately 112 MPH. Wow . . . we are gaining speed all along the way!
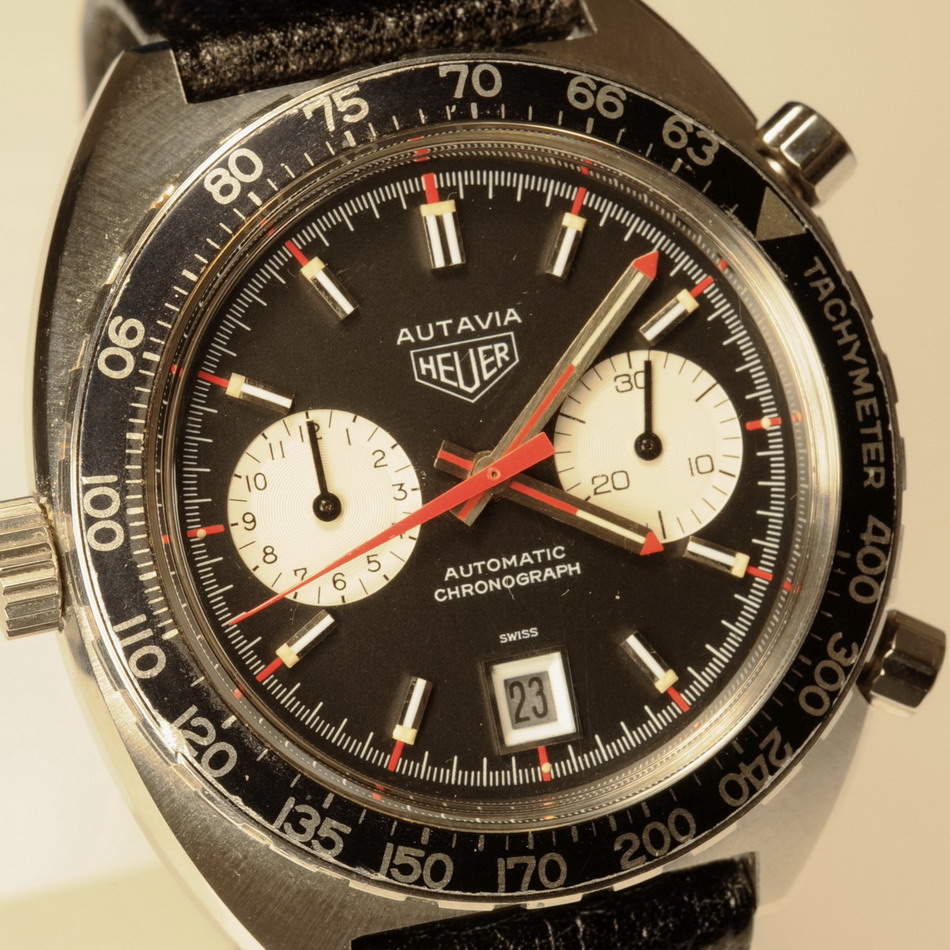
- After you pass the 3 mile marker, you will need to rotate the triangle (arrow) to the 42 second position, so that the tachymeter scale is in position to give you the reading for the fourth mile.
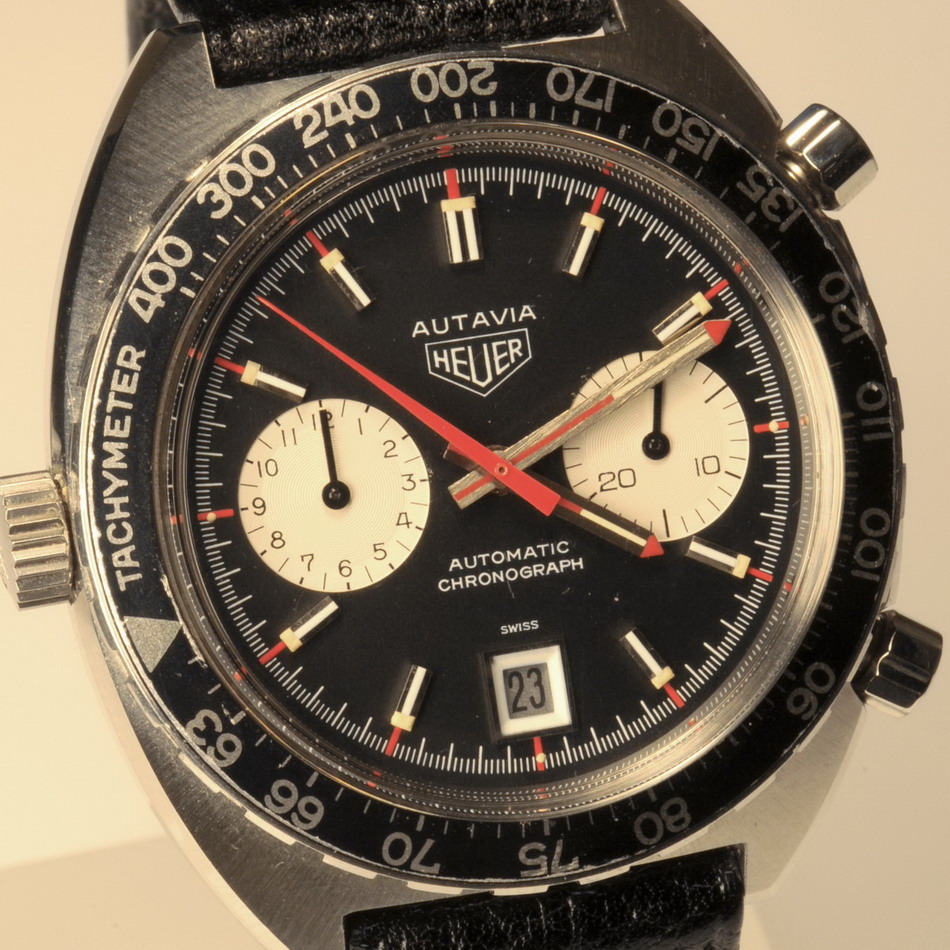
- Just as you pass the 3 mile marker, your radar detector unit starts screaming and flashing . . . oh no, police ahead!! You hit the brakes, slow your car down, and cover the fourth mile in 50 seconds. So as you pass the 4 mile marker, the chronograph second hand is at the 32 second position, indicating that you have covered the fourth mile at an average speed of 72 MPH. Certainly not as exciting as the first three miles, but at least you have avoided the speeding ticket!!
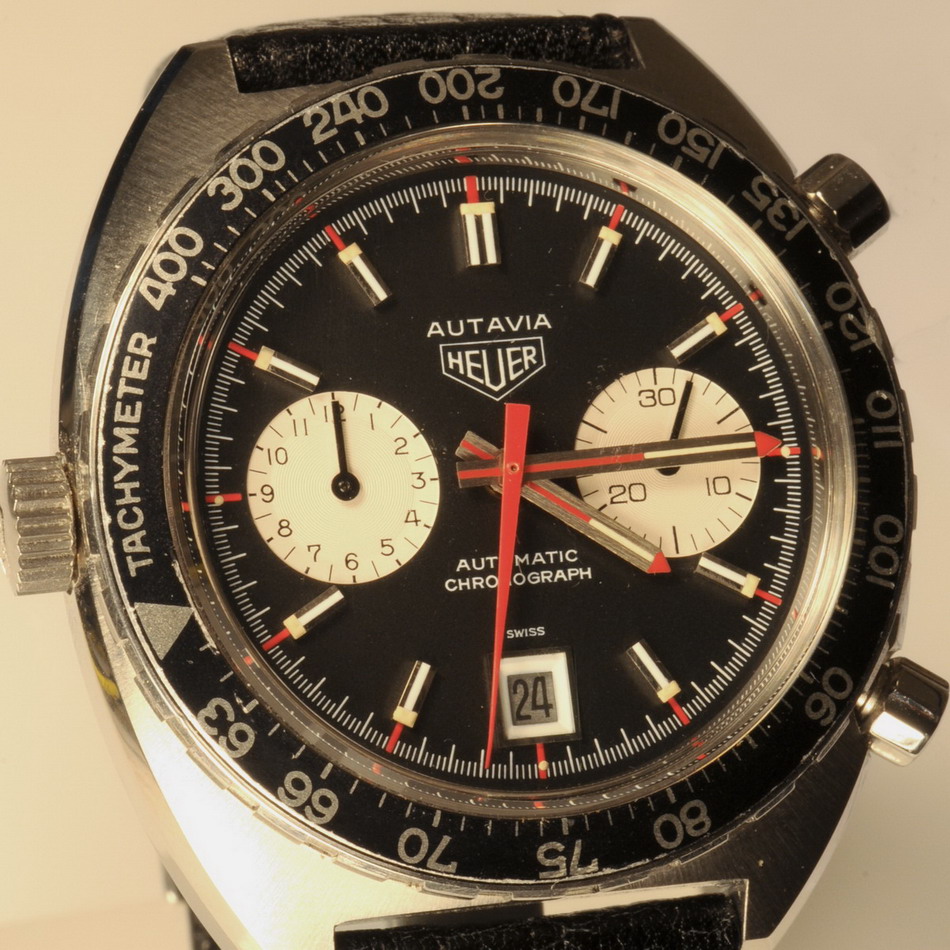
Notice that the chronographs runs continuously during this process — you spot the mile markers, check to see where the chronograph second hand is pointing on the tachymeter scale, and then rotate the tachymeter bezel to its proper position for the next mile, but the chronograph continues running throughout this operation. If you stop the chronograph at the end of the process (say, as you pass the 4 mile marker), the chronograph will indicate your elapsed time for the four miles . . . in this instance, 2 minutes and 32 seconds. From this, you can use a calculator to compute your average speed for the four mile run, at 94.7 MPH. Unfortunately, the tachymeter scale is not easily used for multi-mile computations.
Is This Realistic?
Now that we have described the sequence of (a) simultaneously spotting the mile marker and taking a direct reading of the chronograph second hand on the tachymeter scale, and (b) then rotating the bezel so that the triangle (arrow) lines up with a certain spot on the dial, we face some questions. Is this really an effective means of measuring time and speed? Is this really how the rotating tachymeter bezel was intended to be used? If we can imagine the racers’ world before there was electronic timing, telemetry and GPS systems, can we imagine that anyone ever actually used an Autavia in this manner?
My experiment in using an Autavia for the equivalent of “lap timing” over measured miles, on Interstate 20 travelling from Atlanta to Birmingham, was nothing short of harrowing. Every 45 to 50 seconds, I had to spot the mile marker, read the chrono second hand on the tachymeter bezel, and then rotate the bezel to its new position. I had the impression that this was taking a toll on the watch, and with a moment of inattention, it would also take a toll on the car (and on me). Also, because I was alone in the car, it was impossible for me to write down or record any of the time or speed information. In short, I was just playing with the Autavia, to pass the time and the miles, on an otherwise boring drive.
Midway through my experiment, however, I realized that this would all have been very different in an actual rally situation. In a rally, the car would have been equipped with two critical items that I was missing — (1) a navigator and (2) a Halda Twinmaster odometer (or an equivalent instrument). So rather than the driver needing to spot the little green mile markers and operate the rotating bezel, the navigator would have used the Twinmaster to determine the one-mile intervals [remember, that the Twinmaster is accurate to the nearest 1/100th mile] and could have easily operated the tachymeter bezel on the Autavia. We can also assume that the navigator could have recorded the times and speeds, and made appropriate calculations all along the way!
The Tachymeter Bezel — A Matter of Style
Having worn chronographs with both fixed and rotating tachymeter bezels for several years, I am of the view that — in the modern era — the tachymeter bezel is primarily a style element, giving the chronograph a sporty look or building on a watch’s motorsports theme. And I am fine with that. Anyone defending the tachymeter bezel as a useful tool should ask how often we find ourselves driving over measured miles and wanting to compute our average speed?
So many elements of our cars, homes and wardrobes are for style, rather than for function alone, and so it is with our watches. We should enjoy the sporty look of a tachymeter bezel, the same way that we admire the spoiler of a Porsche 911 or the design of a six-burner Viking stove. Yes, these are high-performance machines built to the specifications of professionals, but none of us need to apologize if it’s primarily the style that we are after.
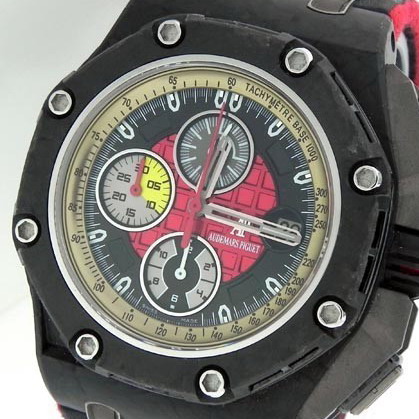
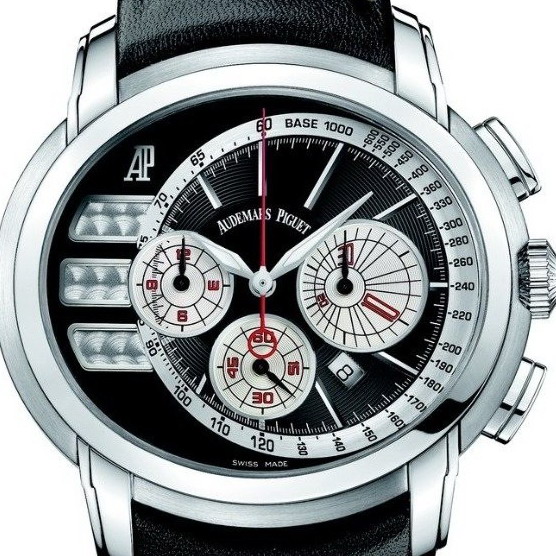
So too, in the world of chronographs, whether we are considering the “classics” from Patek Phlippe, Rolex, Omega or Heuer, or some of the newer models that incorporate a tachymeter bezel (such as the Audemars Piguet chronographs, shown below), we probably do best to admit that the tachymeter bezel is added to a chronograph primarily for the sake of style, rather than for its usefulness as a tool. We can all admit this, and not feel guilty for pretending to be racers.
But Wait, the Rotating Bezel is Different
But let’s not lump the rotating tachymeter bezel with the fixed tachymeter bezel, and dismiss both of them as merely stylistic elements. The triangle (arrow) on the rotating bezel can itself be used to mark a current or future time. Accordingly, the rotating tachymeter bezel can be used to determine elapsed time (“the lecture began at 9:03”) or as a reminder (“this is when I need to take the brownies out of the oven” or “this is when the time on my parking meter expires”). As such, the rotating bezel provides another tool for timing, in addition to the chronograph itself. Timing the lecture, the brownies or the parking meter may not be as romantic as computing average speeds on the Mulsanne Straight or at the Indianapolis Motor Speedway, but that little triangle makes the rotating bezel another useful “tool”, on what we categorize as a “tool watch”.
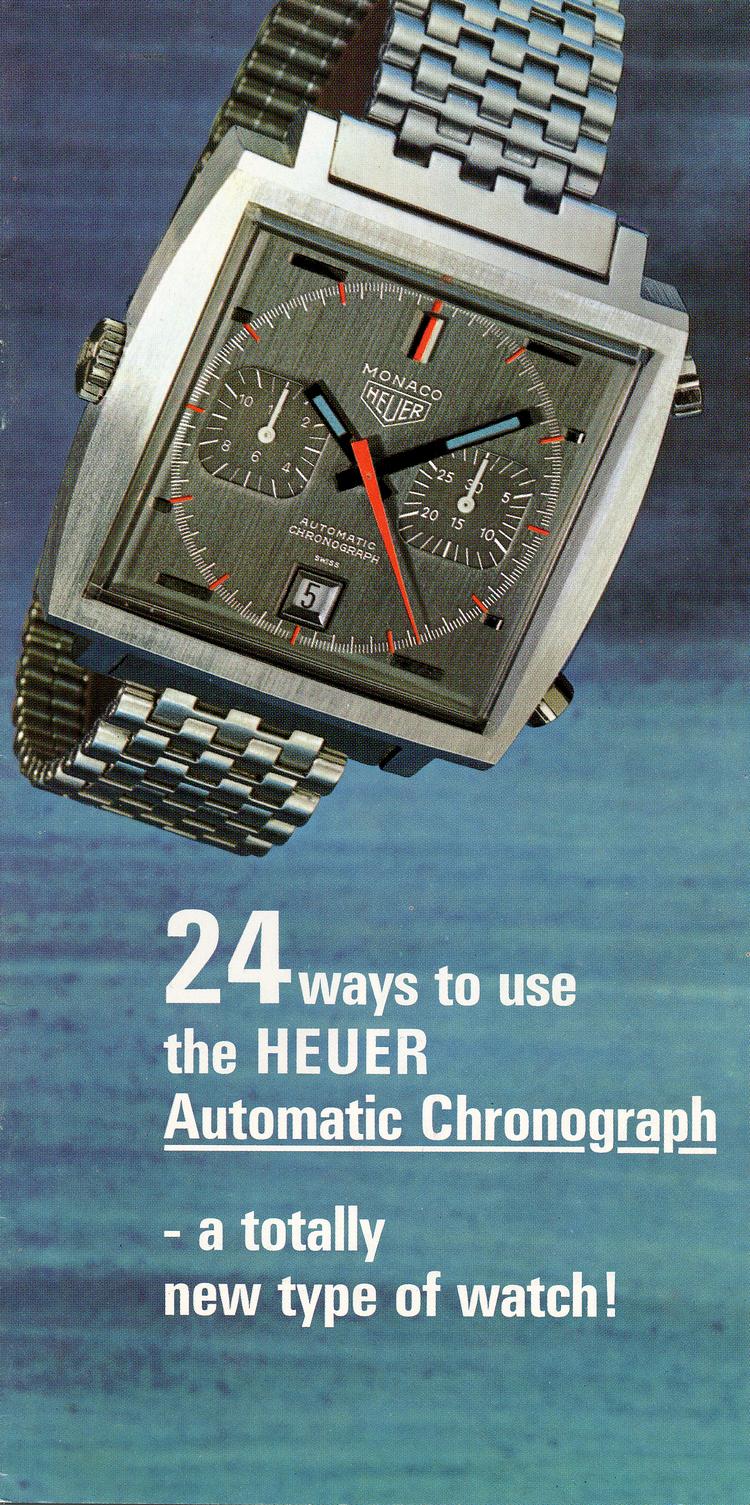
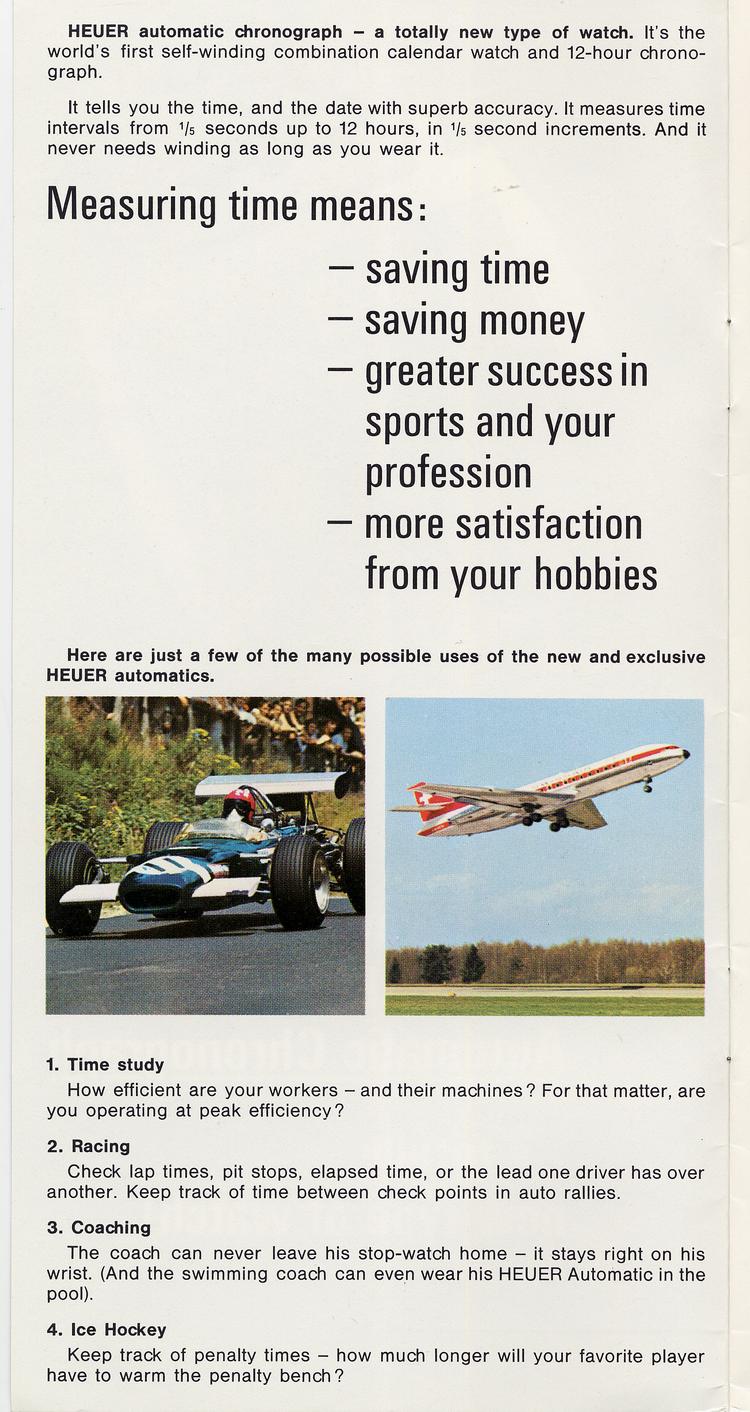
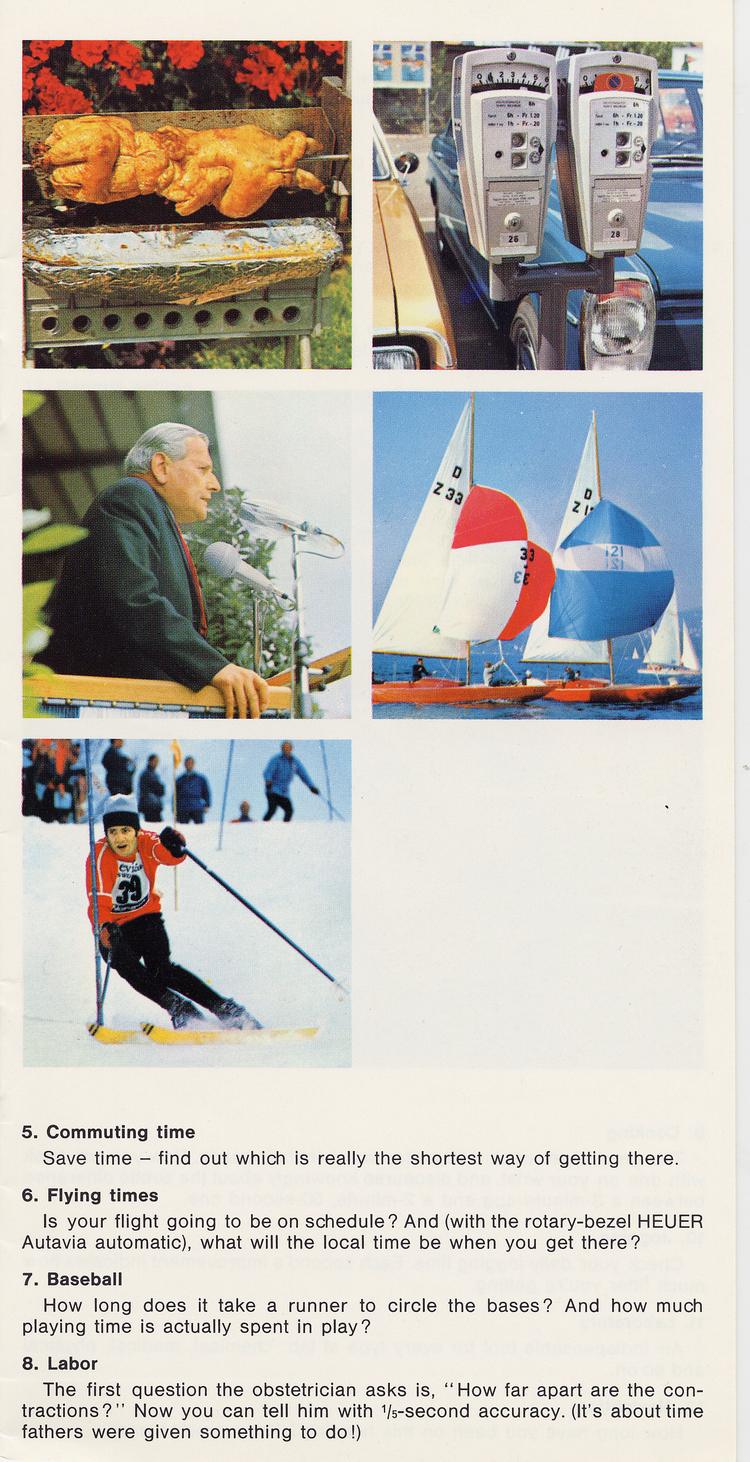
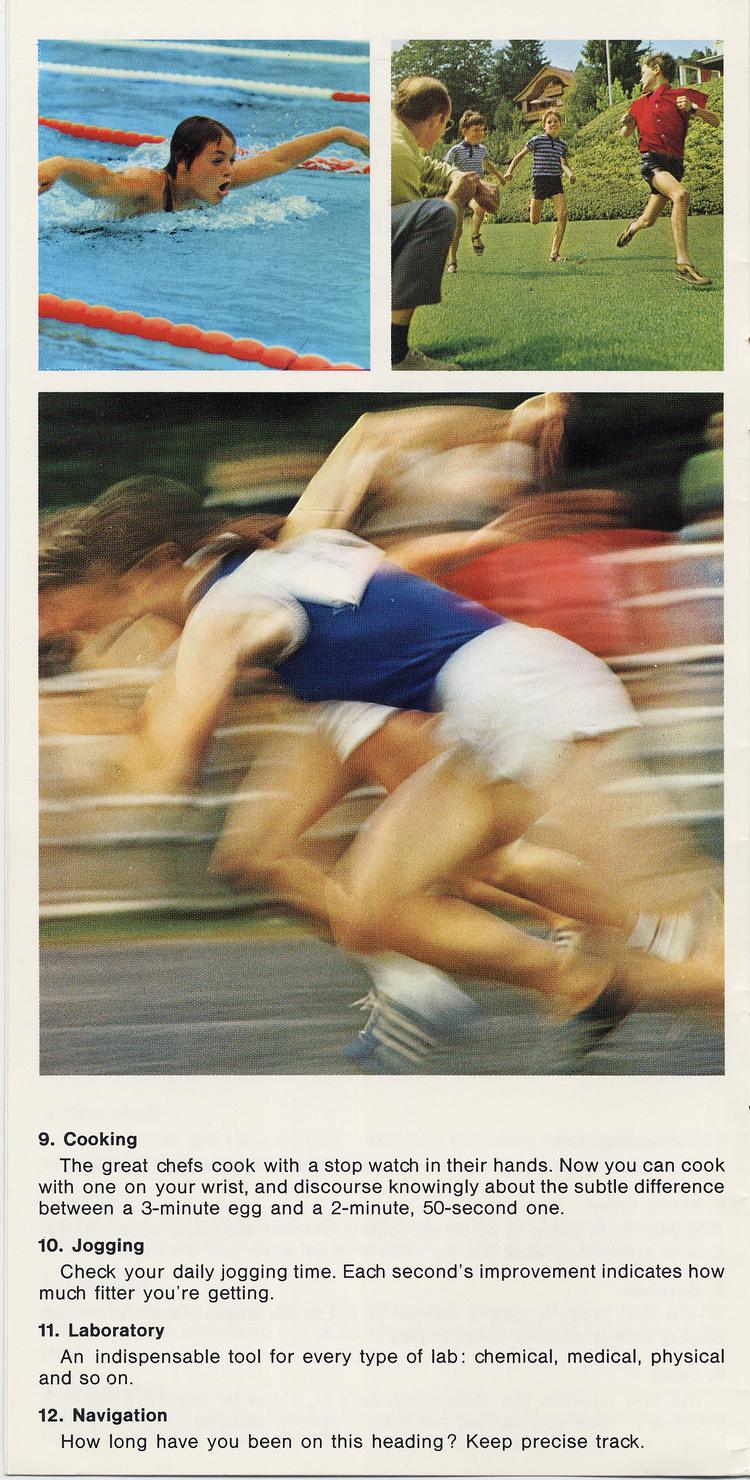
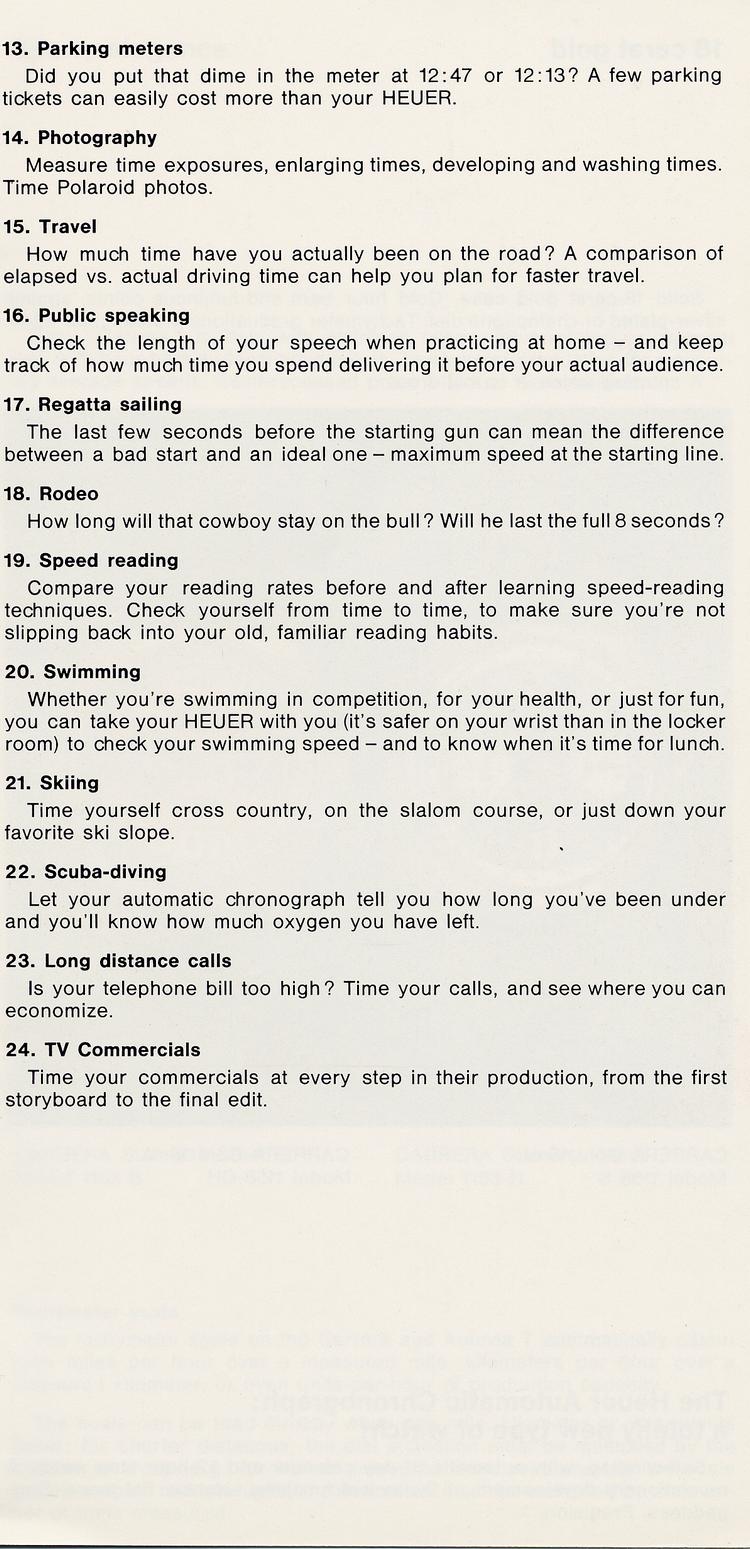
Have a look at the 1970 brochure from Heuer (shown below), describing the 24 uses for an automatic chronograph, and notice how many of these operations can be accomplished simply by using a rotating bezel.
The Conventional Wisdom — Rotate the Minutes and Hours Bezels; Fix the Tachymeter Bezel
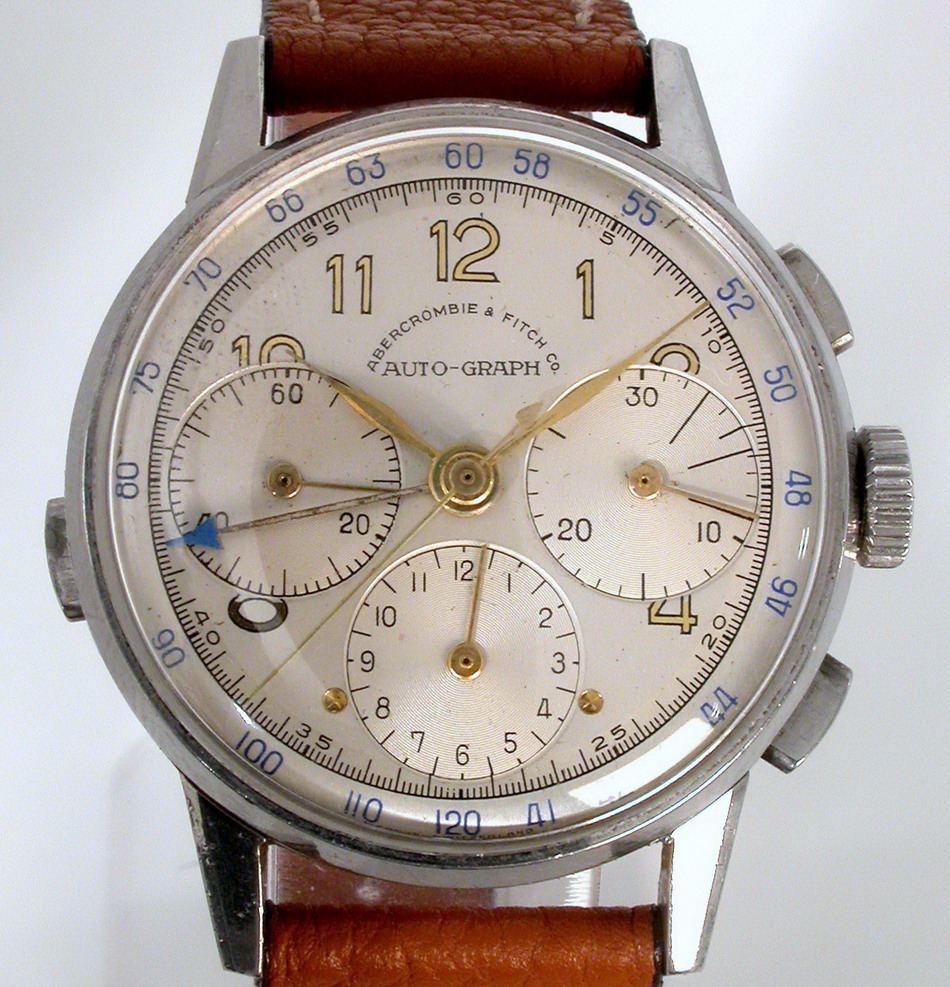
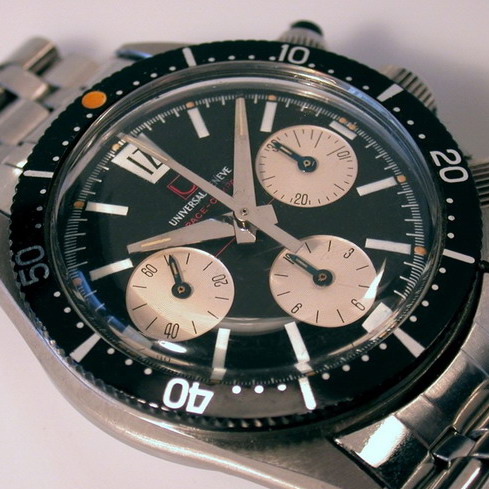
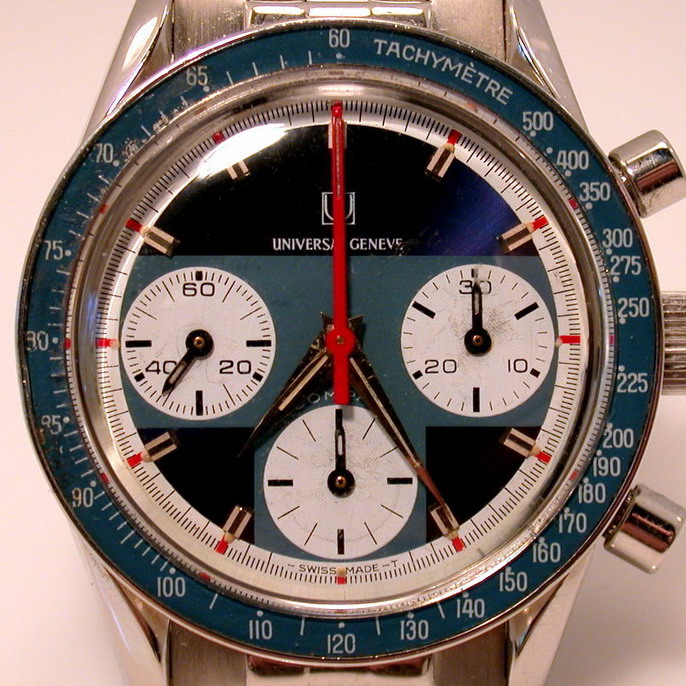
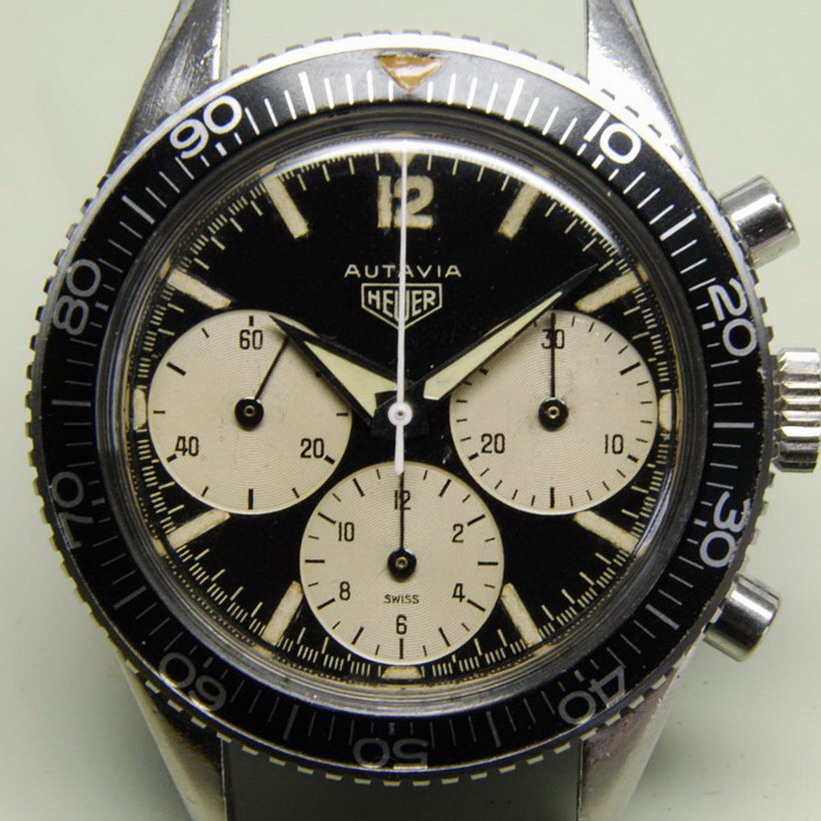
It is interesting to consider why, back in 1962, Heuer designed its Autavia with a rotating bezel, whereas Rolex, Omega and Breitling were more likely to leave the bezels on their chronographs “fixed” in place. Omega used rotating bezels on some of its watches, but not on its chronographs. So too, Rolex was a pioneer of the rotating bezel, with its Turn-O-Graphs and Submariners, but Rolex never used a rotating bezel on its chronographs. We see brands like Brietling (with its Navitimers, Unitimes and Co-Pilots) and Universal Geneve (with the Compax series) that used rotating bezels on chronographs, but — as shown by the pair of Universal Geneve Compax chronographs (below) — it was only the minutes and hours bezels that rotated.
If the chronograph had a tachymeter bezel, the bezel would be fixed in place. It almost seems that the major brands believed that it violated some law to have a rotatings tachymeter bezel.
Heuer’s Innovation — The Rotating Tachymeter Bezel
At least among the major brands, it seems that Heuer was alone in building a chronograph with a rotating tachymeter scale. Almost 50 years after the fact, we can only speculate as to why things developed in this manner. I have a theory as to why Heuer used rotating bezels on the Autavia, first the rotating minute or hour bezels and then the rotating decimal minutes and tachymeter. It all derives from Heuer’s experience in providing timing equipment to racers, and especially Heuer’s series of dashboard timers and purpose-built stopwatches.
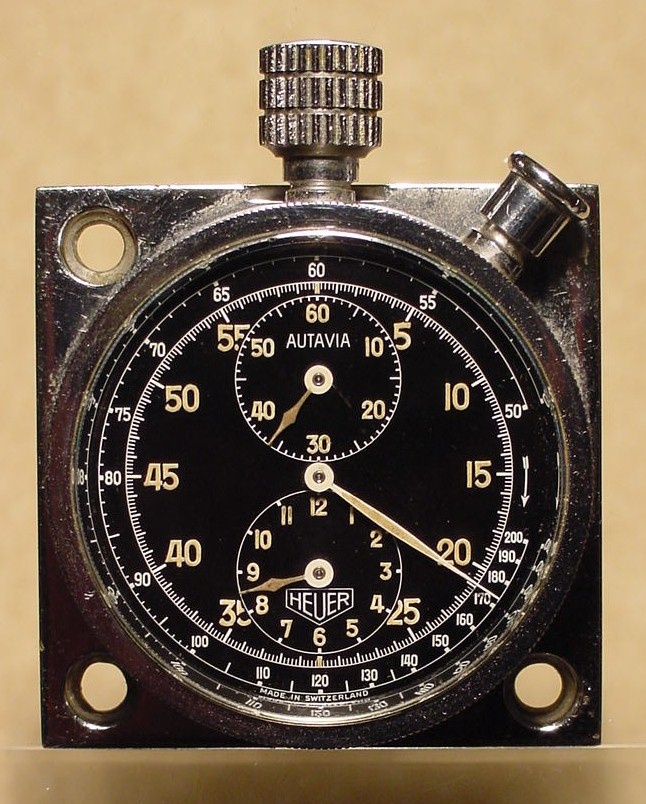
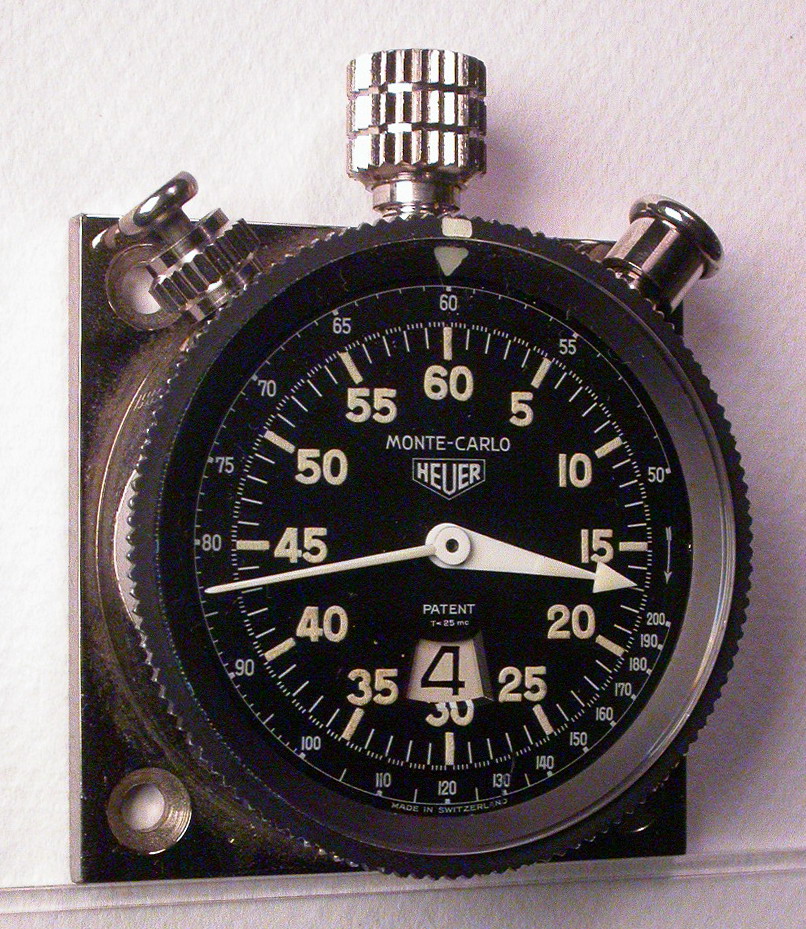
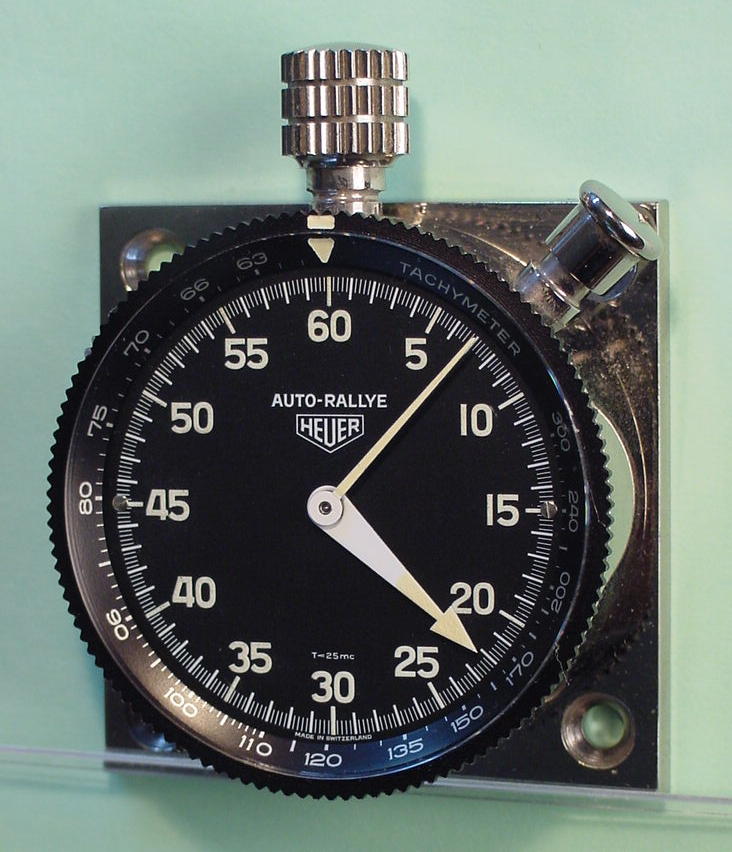
From 1933 through 1958, Heuer’s dashboard timepieces (Autavia, Hervue and Auto-Rallye) had screw-on bezels, meaning that they did not rotate. In 1958, however, Heuer redesigned the primary models in its dashboard line-up — Master Time, Monte Carlo and Auto-Rallye – to incorporate rotating bezels. The earliest models of these dashboard timers had only the triangle (arrow) on the bezel, to mark a time.
Over the years, Heuer realized that it was useful to allow for a rotating tachymeter bezel on its dashboard instruments. Below, we see that there was an evolution from having the tachymeter scale printed on the dial (as shown on the earlier Autavia and Monte Carlo), to having the tachymeter scale marked on the rotating bezel. While we see relatively few dashboard timers with the rotating tachymeter bezel, it is telling that Heuer even offered this option.
My theory as to why Heuer incorporated a rotating bezel into the Autavia chronographs suggests that through the years of supplying timing equipment to the racers and motorsports crowd — including the stopwatches, dashboard timers, timing boards and other equipment — Heuer realized the value of the rotating bezel. Even in its simplest form, with nothing more than a rotating triangle, the rotating bezel could be a useful tool. So it was to be expected that when Heuer introduced its Autavia chronograph in 1962, a chronograph designed for AUTomotive timing, the AUTavia included a rotating bezel. On the first series of Autavias, Heuer used hour and minute scales on the bezels. Both these scales supplemented the chronograph as a timing device. The rotating hour bezel could be set for a second time zone, making the Autavia a simple GMT chronograph. Next, Heuer added a decimal minutes bezel, meeting a particular need of rally timing (in which times are satted in hundredths of minutes rather than seconds.)
With Heuer’s introduction of the second execution of the Autavia case, in around 1967, Heuer introduced the first chronograph with a rotating tachymeter bezel (shown below). This rotating tachymeter bezel would become a hallmark of the Autavias, being used on various models of into the early 1980s.
The Autavia — The Racer’s Favorite Heuer.
We began this posting with a simple question about the usefulness of a rotating tachymeter bezel and, in the course of exploring this question, we learned that the rotating tachymeter bezel was a unique element offered by Heuer in its Autavia line of chronographs. While the other major brands (such as Rolex and Omega), with their fixed tachymeter bezels, could offer the sporty look and show the average speed for one measured mile, it was only Heuer that allowed the racer (or his navigator) to compute average speeds over consecutive miles. As we understand the usefulness of the rotating tachymeter bezel for race timing, we also gain a new appreciation of the rotating tachymeter bezel as a defining feature of some of the cherished Autavia models, specifically the Reference 1163 T (worn by Swiss Formula One hero, Jo Siffert) and the Reference 1163 V (sold to thousands of amateur racers for $88, as a promotion by the Viceroy cigarette brand).
The Autavia was more than the racer’s favorite chronograph, however. In the 1960s and 1970s, the Heuer Autavia became the race fan’s favorite chronograph. In the early days of stock car racing — with the competition between Ford, Mercury, Chevrolet, Pontiac, Dodge and Chrysler — the automobile manufacturers lived by the slogan, “Win on Sunday, Sell on Monday”. Indeed, studies showed that the cars that won the races on Sunday also won in the dealer showrooms on Monday. So too, in the days before paid ambassadors, the watch brands realized that racing enthusiasts wanted to wear the same watches as the racers, and they wanted the look of racing. This racing look was embodied by the tachymeter bezel. While the iconic Rolex Daytonas and Omega Speedmasters offered “the look” with their fixed bezels, the Heuer Autavia offered this look, but with something more. With the rotating tachymeter bezel, Heuer improved the functionality of the Autavia, as a timekeeping device. The tachymeter bezel gave enthusiasts the “look” of racing; allowing the bezel to rotate gave them a useful tool to time measured miles, a second time zone, or when to add coins to the parking meter or take the brownies out of the oven!
So we can look like Formula One legend Jo Siffert, with the white-dialed Autavia, and we can imagine that we are on Parnelli Jones’s racing team with the black-dialed “Viceroy”. We can determine our average speed for a measured mile, and even for consecutive measured miles. We can remember when we need to put more quarters in the parking meter or when we need to take the brownies out of the oven. The Autavia, favorite chronograph of the racers . . . the Autavia, favorite chronograph of the bakers!


[…] […]
[…] […]